 DNS Unpacked
Pointing your domain at a website host
The short version
- There are two ways to connect a domain to a host.
- Way 1: switch your nameservers to the host. The host then runs all your DNS.
- Way 2: keep your DNS where it is, and add the records the host gives you.
- Way 2 usually means an A record for the bare domain and a CNAME for
www. - Afterwards, check your work with a lookup tool, and give caches time to catch up.
First, find where your DNS lives
Before you change anything, work out two things.
- Who is your registrar? That's where you manage your domain's settings.[1] The registrars chapter shows how to look it up.
- Who runs your DNS? Look up your domain's nameservers. The nameservers chapter shows how. Often it is the registrar. Sometimes it is a separate DNS provider.
Your records live wherever your nameservers point. That's where any new records need to go.
Two ways to connect
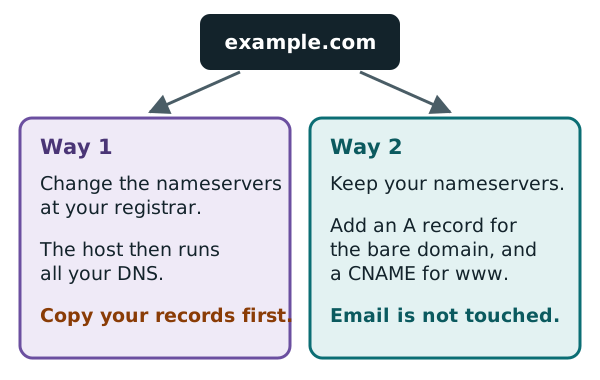
Your host's instructions will ask for one of two things. Some hosts offer both.
Way 1: change your nameservers
The host gives you two or more nameserver names. You enter them at your registrar, in place of the old ones.[2]
After that, the host runs your DNS. Any record you need, you add at the host.
This is the simpler choice if the host is going to manage everything. But remember the warning from the nameservers chapter. Switching moves all your records, including email. Copy every existing record to the host first.
Way 2: add records, keep your nameservers
Here you leave your nameservers alone. You just add a few records where your DNS already lives.
This is the safer choice if you already have email or other services on the domain. Nothing else changes.
Hosts usually ask for:
- an A record (and maybe an AAAA record) for the bare domain, pointing at the host's IP addresses
- a CNAME record for
www, pointing at a name the host gives you
What host instructions look like
Here is a real example from one host's help pages. It lists four IP addresses for the bare domain's A records:[3]
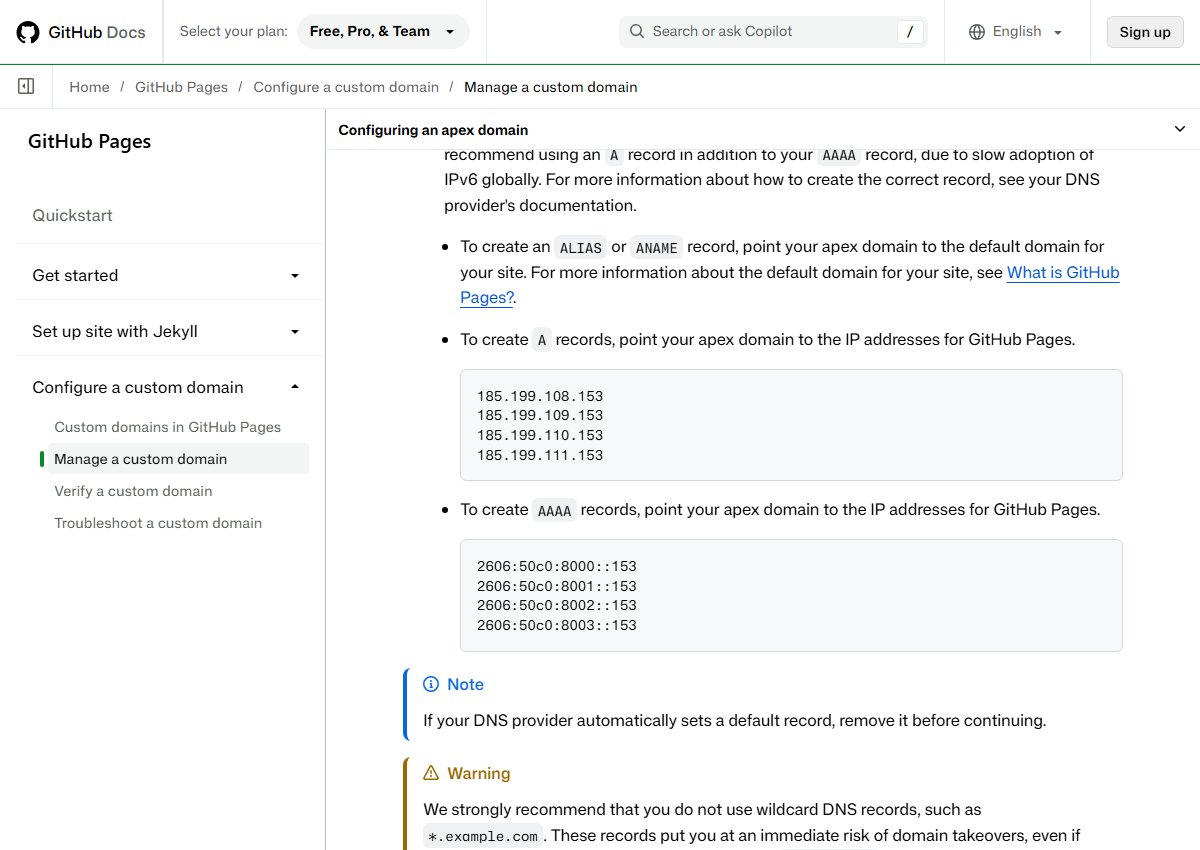
The same guide asks for a CNAME on www. It points at a name the host gives you.[3] That's the pattern from the A record and CNAME chapters.
Notice the note in the picture. Some DNS providers add a default record by themselves. The guide says to remove that first.[3] Otherwise the old record and the new ones would compete.
In your DNS dashboard, the records usually go in as rows like these. The @ symbol is short for the bare domain itself:[4]
| Type | Name | Value |
|---|---|---|
| A | @ | 192.0.2.10 |
| A | @ | 192.0.2.11 |
| CNAME | www | example.net |
The addresses and names above are examples. Use the exact values your host gives you.
Checking your work
Once the records are in, check them with a lookup tool.
On the web: Google's Dig tool works in any browser. Type your domain, then pick the record type, such as A or CNAME:
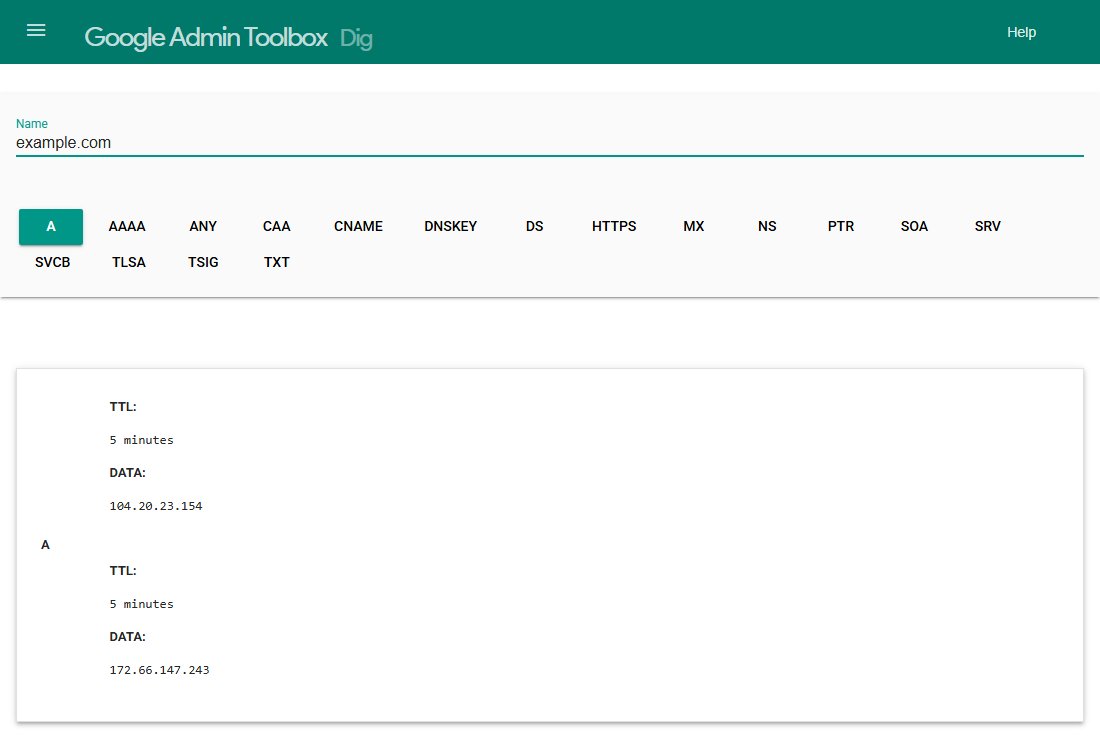
Compare the answer with your host's instructions. Every address should match.
In a terminal: you can use the dig command. Your host may even give you the exact command to run.[3]
$ dig example.com +noall +answer -t A
example.com.    3600    IN    A    192.0.2.10
example.com.    3600    IN    A    192.0.2.11
Windows doesn't include dig.[3] Instead, you can use the Resolve-DnsName command in PowerShell.[3]
If it doesn't work yet
Don't panic straight away. The likely reason is caching.
- Old copies of your records may still be in caches. That host's guide says changes can take up to 24 hours.[3] The TTL chapter explains why.
- If you looked up the name before adding it, a "no such name" answer may be cached too.
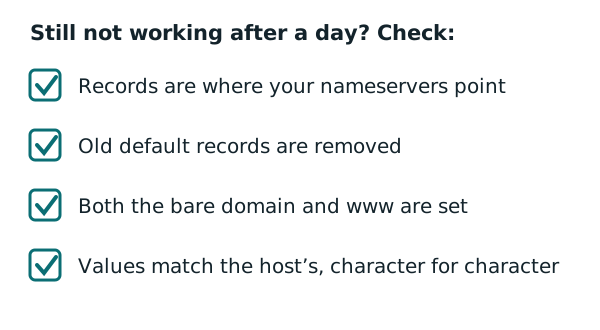
If it still fails after a day, check these:
- Did you add the records where your nameservers point? Records added anywhere else are ignored.
- Is there an old default record left over?
- Did you set up both the bare domain and
www? - Did you type the values exactly, with no extra spaces?
The same steps for other services
You'll use these steps again and again. Email providers, search tools and many other services work the same way.
Each one gives you records to add. If it can't do this for you automatically, you add them by hand at your DNS provider.[5] Then you check them with a lookup tool, and wait for caches to catch up.
That's the whole guide. You now know how a name becomes a number, who runs each part, and how to connect your own domain.
Sources
- Domain Name Registrants, ICANN (accessed 2026-10-18)
- Update nameservers, Cloudflare DNS docs (accessed 2026-10-18)
- Managing a custom domain for your GitHub Pages site, GitHub Docs (accessed 2026-10-18)
- RFC 1035: Domain names - implementation and specification, IETF (accessed 2026-10-18)
- Verify your site ownership, Google Search Console Help (accessed 2026-10-18)